
DIY ~ Seed Saving 101


Seed Saving 101
Over the years, I have learned a few tricks for cutting corners and keeping garden costs down while still enjoying lots of beautiful flowers. On the very top of that list is saving seeds during each gardening season. Now some plants, such as foxglove, columbine, nasturtiums and cleome, have a tendency to reseed all by themselves. If you prefer a more nature-intended look, just make sure to let them go to seed before you cut them back after frost. But maybe you have another spot where you’d like to add these varieties, you want to share with friends or a more formal look is what you are after. Then seed saving is for you.
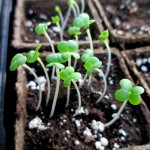
Not only can you grow free plants from your harvested seeds, you can also get a jump on the season if you have a sunny window or two, a cold frame or greenhouse. Seed saving is really a simple process. First, gather the plant seed heads or pods. I usually lay them out on a paper towel in our garden room to dry. Now go and clean up the rest of the garden and let them sit for a week or two. Separate the seeds from the plant material when thoroughly dry and store in paper envelopes labelled with the plant name and flower color. Do not store your seeds in plastic bags because, if any moisture remains, you stand to lose your gatherings to mildew or rot.
In the spring, you now have a plentiful seed supply to start your own indoor seedlings or to sow directly into your flower beds. Think of this as recycling your plants! Did I mention the money you will save? My homegrown purple hyacinth bean vines cost $3 to $5 each at local garden centers. But I have plenty of seed to start plants for our garden as well as for family and friends.
Better yet, network with your gardening friends and trade seeds to get new varieties for free. Join a local garden club, usually they have a plant and seed exchange once a year as part of their programming. Some of the plants I love and save seed from are very special because they are “heirlooms” from my grandparents, parents and dear friends.
So, save money, have the satisfaction of doing it yourself and spread your garden legacy by saving seeds!
If you enjoyed this article, come see our Garden Room and how to start seeds too !

Our Garden Room ~ click it !
Seed Starting at home ~ click it !


I occasionally save seeds but have always forgotten to use them the next spring. Do you know how long seeds stay viable? Can I use them a couple of years later?
Thanks for writing, Gretchen! Forgetting to use your saved seeds can be a problem. I tend to leave my labeled envelopes of seed out on a shelf in the garden room so I remember to start them and don’t have to go looking to see where I stashed them! But, many seeds are viable for quite a long time. Length of time that they can be used varies by the seed type, but you can test for viability by germinating a few between damp paper towels. If, in a few days, the seeds don’t start to sprout, they probably won’t grow for you. Many home seed starters actually germinate the seeds in this way and then plant just the sprouted ones in starter pots or trays.
Happy seed saving & planting!
Barb
It’s a good idea to put your saved seed in a cool, dry, dark spot. And yes, many seed are still viable for years. To test for germination on old seed, take 10 seeds, lay them out on a damp paper towel. Roll up the towel ( I normally put the towel in an open Ziploc bag) and put on top of a warm place. The top of the refrigerator works great. Check the seed after about 10-14 days. Any seed less than 5 discard. 6 and above are certainly worth a try.
Excellent tips, Catherine! Sounds you are a lady who has harvested flower seeds before!