
DIY Project ~ Bowling Ball Garden Accent

When cleaning out his mother’s house, a good friend came across four bowling balls from when the family bowled on leagues. Happy memories, one ball even had his father’s name engraved on the bottom. Because he had seen bowling balls I covered in the past with pennies, stones and shells, he knew this collection would be transformed and have a new life in our garden. I was thrilled when he gave them to me!
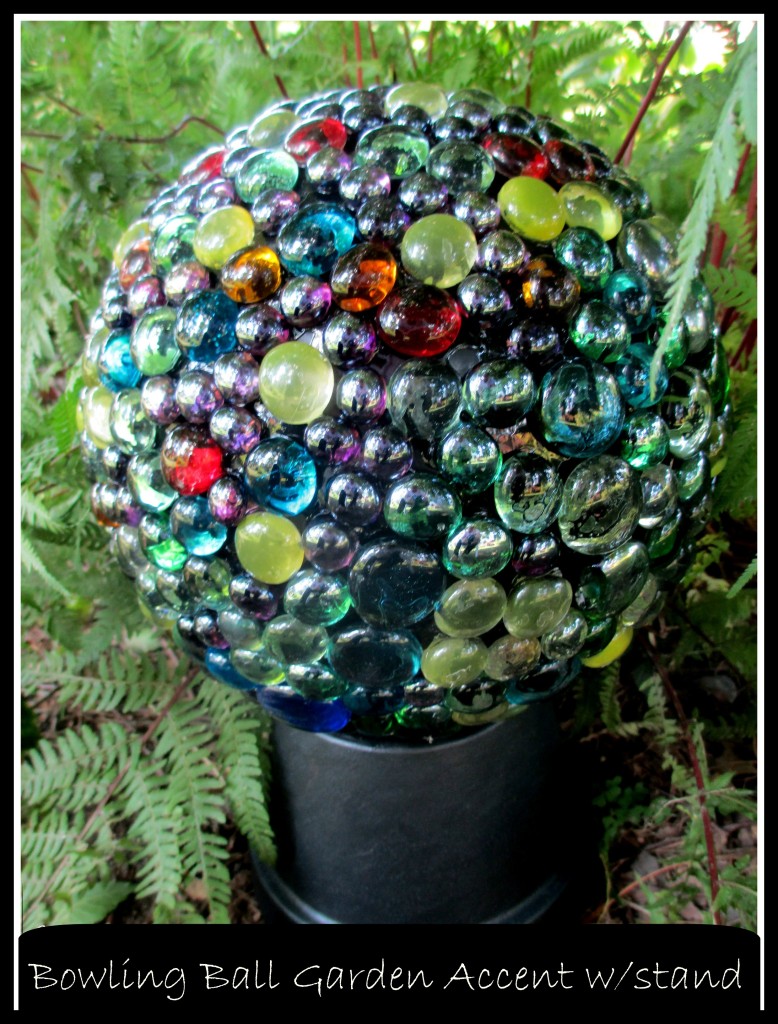
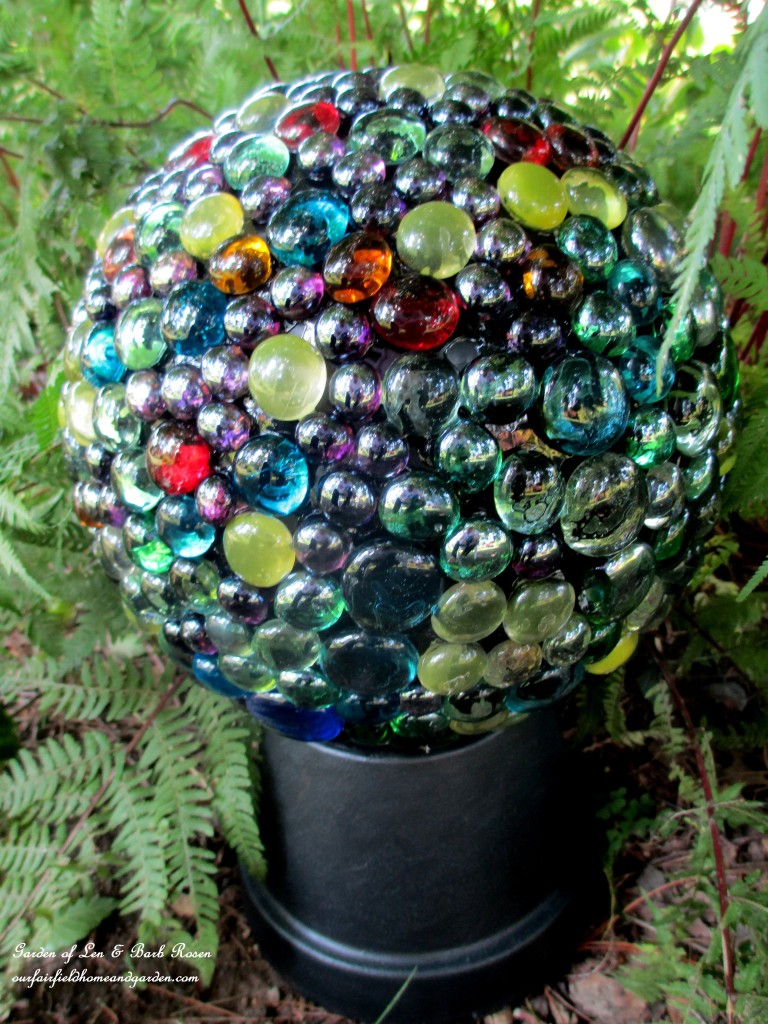
But it didn’t seem right to keep all those memories. I decided to decorate his dad’s bowling ball and return it as a gift for their garden. Carefully placed, the glass beads cover the entire bowling ball except for his name and the finger hold holes.
You may have seen directions previous to mine on repurposing a bowling ball into a garden accent. This is my twist on a popular project; I don’t use grout and I make a stand for the bowling ball to lift it off the ground.
Materials you will need for this project are :
Bowling Ball (some folks like to paint them) Paint (mine was leftover from another project)
6 and 1/2 inch diameter flower pot a 12 inch piece of rebar or pipe
E6000 glue (large tube) a sponge brush
5 bags of flattened glass beads (Dollar Store) blue painter’s tape
a hammer (to anchor the base) newspaper to paint on
*Note: Do this project outside or in a well ventilated room!
This is an easy project but give yourself lots of time to do it. It took most of the day to cover the ball as I had to put on a few rows of beads and then allow drying time before adding more. Let the covered ball dry overnight before placing outside. This garden accent should be stored in a shed or garage over winter where the weather is harsh.
Using materials I already had on hand, I only had to purchase the glue, glass beads and rebar. So, my gift of past memories reinvented only cost about $12 to create. I can’t wait to see his face when he sees it!
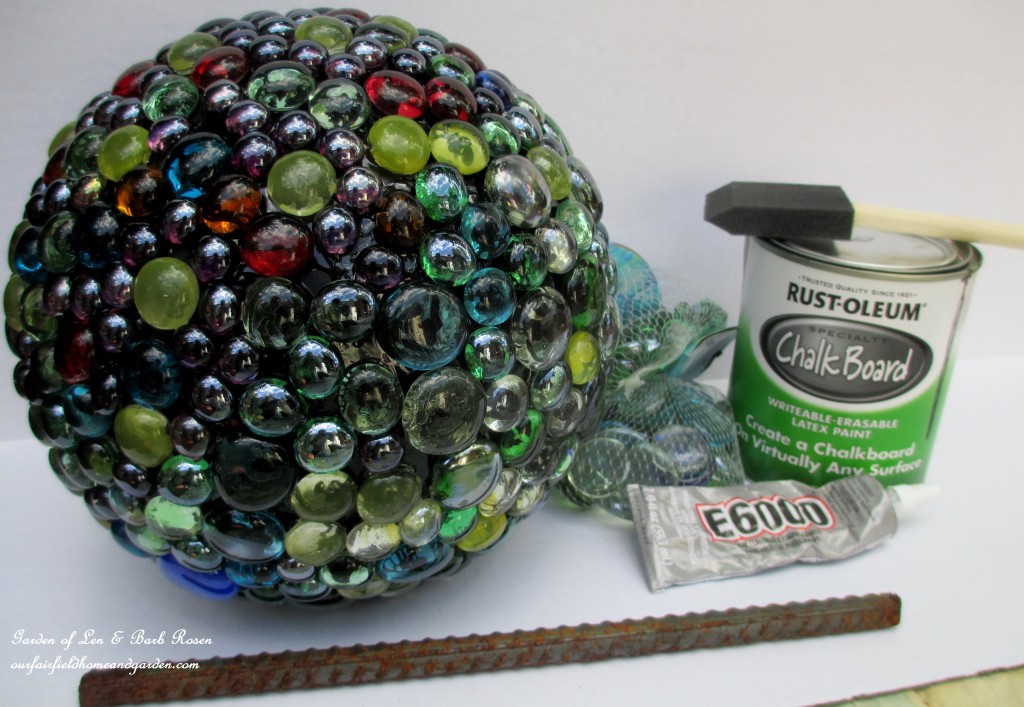
Materials needed to make your own Bowling Ball Garden Accent

Attach the glass beads to the bowling ball with E6000 glue. I like to start at the top, let it dry and then invert the bowling ball so successive rows have a foundation to hold them in place. I leave the holes uncovered.

Use the flower pot as a stand as you glue each row of glass beads on to the bowling ball. Blue painter’s tape will come in handy to keep the beads in place until the glue sets. Use a variety of sizes and colors of glass beads for a great look.

Use leftover paint in the color desired to cover the flowerpot and rebar.
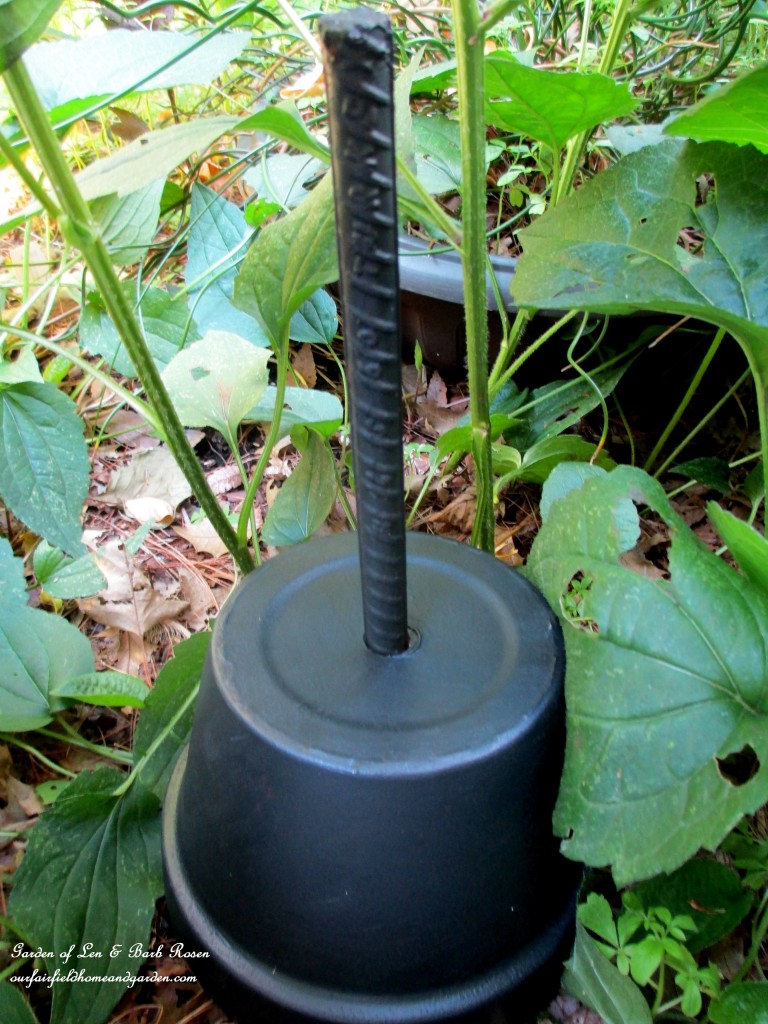
Use a hammer to pound the rebar stake into the ground, leaving about 3 inches above the pot. Place the bowling ball onto the stake using one of the finger hold holes.
DIY Project ~ Bowling Ball Garden Accent


I love this! A perfect piece of art for your garden! Cheers.
Thanks! This one is headed back to the friend who gifted me with 4 bowling balls! But I am definitely going to make a few for our garden too!